


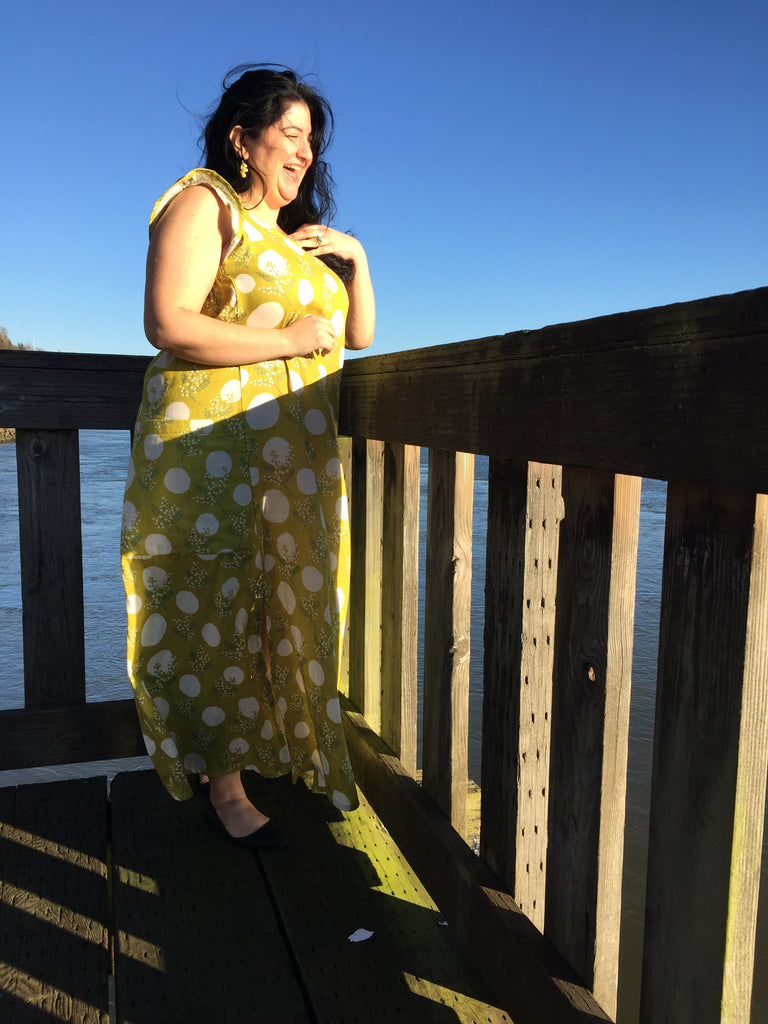
The lovely Astrid modeling the Montavilla Muumuu - full muumuu version #3.
After I released the Montavilla Muumuu pattern in late August, Kelly Hogaboom (aka the Vegan Tailor), emailed me and let me know she wanted to make one and offered to write a sew along for me. Of course I agreed. Kelly has written sew alongs for my Toaster Sweaters and Tea House Dress and she is a phenomenal seamstress with loads of tips and knowledge about sewing. I am so thankful for all of her help and I am thrilled that she wanted to do this for me. She will be running a sew along for the Burnside Bibs soon as well so stay tuned for that. And with that, I will leave the rest to Kelly. Please follow along below.
Cheers and happy sewing!
Peggy
When I first saw this pattern preview in social media, I fell in love. Once again, Peggy's subtle sensibilities and simple silhouettes have resulted in a unique version of a classic design.
The Montavilla Muumuu pattern provides us a sleeveless, a-line garment in three lengths: a top, a midi, and maxi dress. The dress versions come with large inset patch pockets, and the pattern provides an optional waist tie for versatility.
The instructions for the pattern are, as we've come to expect from Sew House 7, thorough and illustrated well. This is a great project, completely attainable for a committed beginner. Here is my long - image-heavy, verbose - sew-along instruction for the garment. I sewed up the maxi version, with no grading or changes.

Below: the size I've selected (size 18) will require 3 1/2 yards for the full muumuu length (as well as the very handy finished measurements chart that Sew House 7 always includes). In my case, the large width of the selvedge on the the double-gauze from Style Maker Fabrics I used, meant I needed even more yardage. It's always a great idea to have extra yardage on hand - although of course, this attitude has garnered me a large stash which I occasionally have to cull!
But, I digress.

After taking our pattern inventory (page 4) and figuring out which view we are making (and thus whether we use pieces 4, 5, and 6 for our garment body or pieces 1, 2, and 3), we cut out our pieces. We will have six pattern pieces for a pocketed version with a tie, and only four pieces for a non-pocketed version without a tie.
I will not be demonstrating my pattern layout (in part because of the odd width of my fabric, due to the wide selvedge), but if you have any questions we can answer them below. Remember also, to clip your notches (1/8" for clipping) or mark them with chalk or washable pen. I also used thread tacks to mark my dart ends (for the front and back pieces) as well as the end of the sleeve/side panel placement.
Once our pieces are cut and our machines is threaded, our first instruction is to stay-stitch both the front and back necklines at 1/4" seam allowance, starting from the shoulder down to the center front/back (page 10).

Next, we stitch the four shoulder "legs", leaving the darts open for the time being.
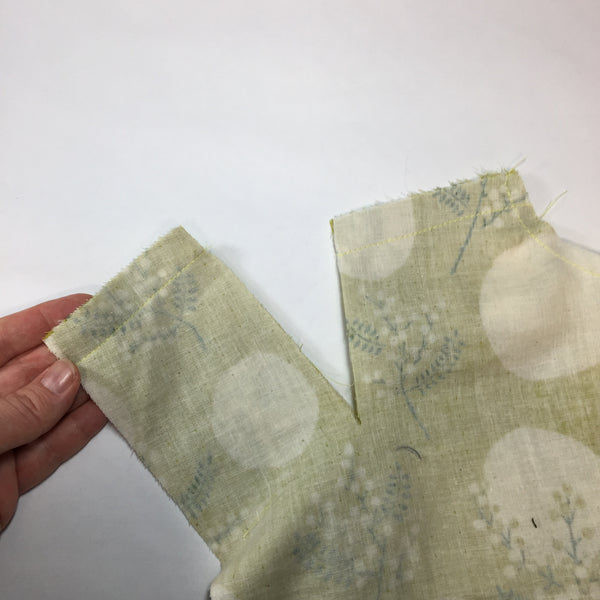

At the bottom of page 10, the instructions tell us we can either finish these shoulder edges before sewing the shoulder seams, or wait until we've sewn the seams. I serge-finished mine after sewing the seams so as not to stretch out the fabric.
Now, this is such a cool part of the pattern! We are going to finish up our neckline right away. This method is a very stable, exacting one and I really like it!
First, we carefully pin our bias strip to the neckline edge (page 11), right sides together. You only need to stretch the bias strip so, so barely/gently. Pin in place.


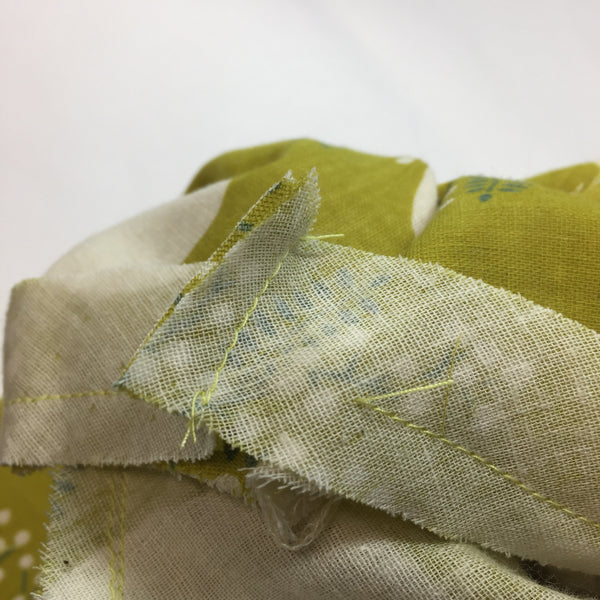
Go ahead and stitch 3/8"! I stitch with the bias binding facing up, and the neckline against the machine. Go slowly! And remember to leave a gap of an inch or so at one of the shoulder seams (top diagram of page 11).


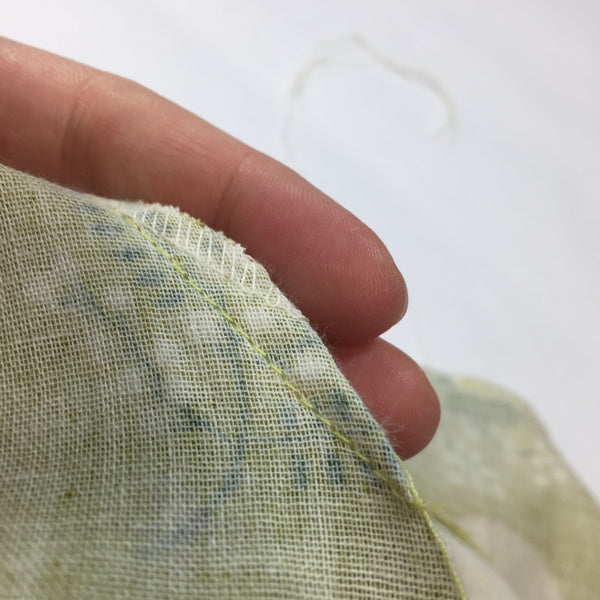
Shown below: the underside, where you can see my staystitching line as well.
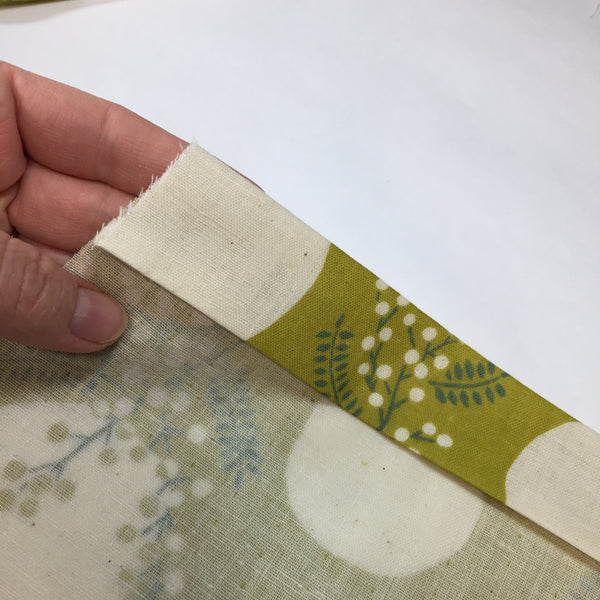
Now, here comes a pretty cool part. We are going to pinch the short ends of the bias strip together, and sew at an angle (second diagram page 11) before we stitch the neckline and strip closed.


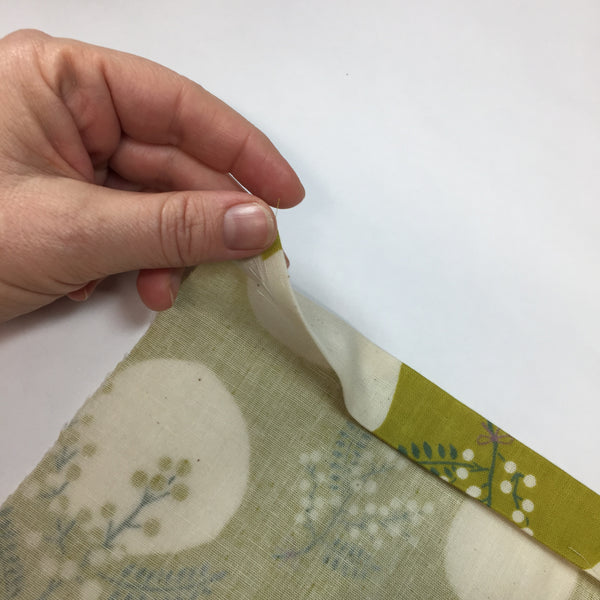
Now, press the trimmed bias ends open, pin to the neckline, and sew it closed (bottom of page 11).


This method is much easier than trying to first measure and close the bias strip before joining it to the neckline! Peachy keen.
Now, clip the curves of the seam allowance you just created (top of page 12). This will help the neckline lay smooth.
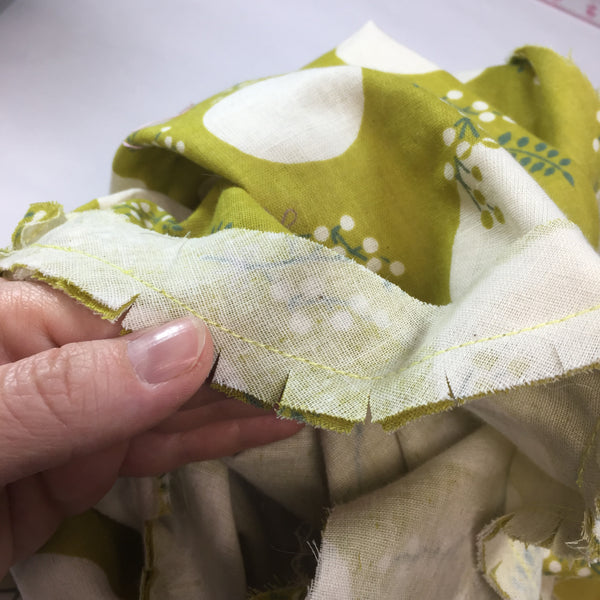
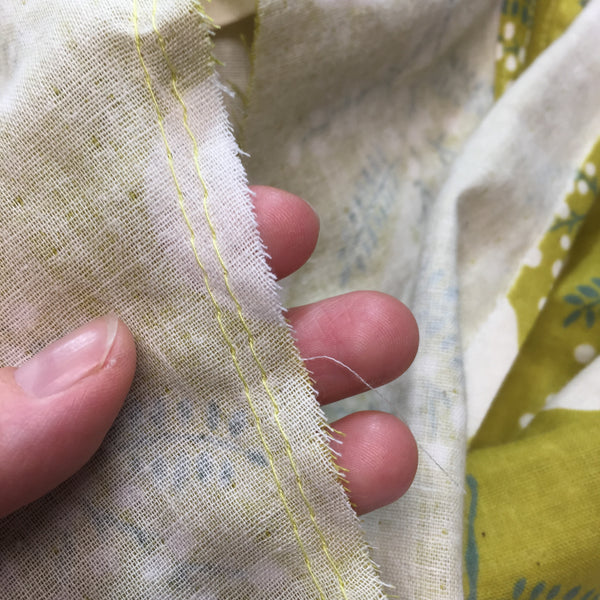
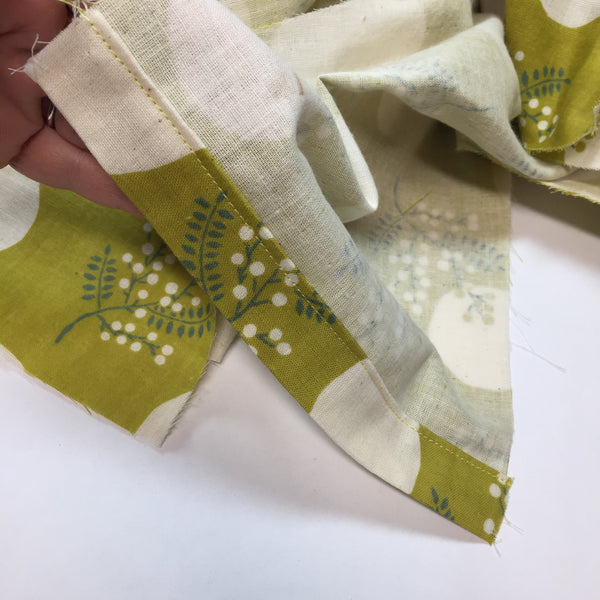
Now, finger-press the bias strip and the clipped seam allowance away from the dress body, and understitch about 1/8" away from the seamline.

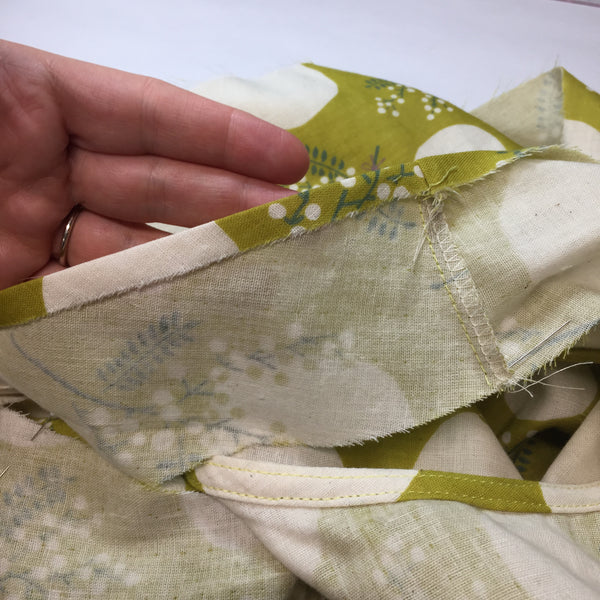
Understitching - you will be sewing the seam allowance to the neck facing. This helps keep the facing from rolling out and becoming visible from the front.


Here is the inside of the dress - with our staystitching, seamline, and understitching line!


Fold the raw edge of the bias strip right to that seamline and press.

Fold again, press and pin in place. We have one more seam to finish our neckline!

Below: stitching at an equal distance from the neckline top edge, making sure to catch that second fold we just pressed. Go slowly! If necessary, use your fingers underneath the dress to gently smooth the neckline as you sew.

All finished with the neckline!

Now it's time to tackle the darts!
This part of the garment might seem tricky conceptually, but it's not. We are simply gathering a long fisheye style dart, with the shoulder seams bisecting the dart. The illustrations (pages 13 through 15) are fantastic.
First, go ahead and press up the sleeve edge (from notch to notch) 1/4" (top of page 13). It is easier to do this now while the garment is flat.
Now, orient yourself so you know which side of the dart you're looking at. We are going to be gathering up the outer leg of the dart, primarily on the front of the garment.

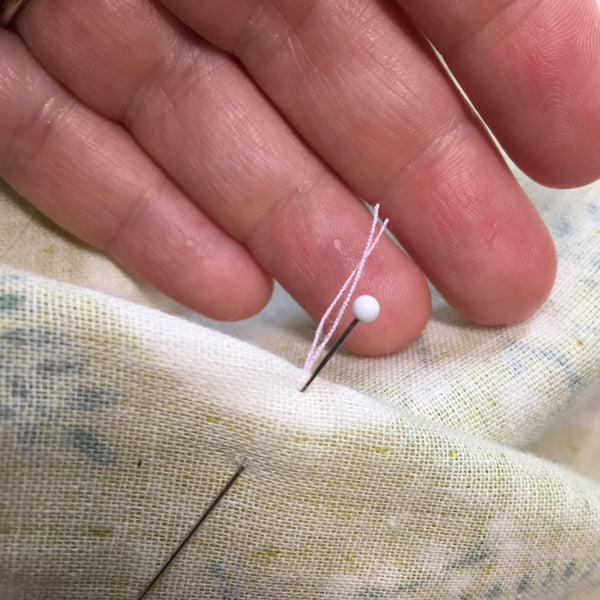
I have pins marking the stop and start of the gathering stitching. Sew two lines of gathering stitches, 1/8" and then 1/4" from the raw edge of the dart. Do not backstitch here. Keep the tails of these lines long, and keep them from tangling.

Here is my little gathering trick, for two lines of stitches like this. I knot the bobbin-side threads at the ends of the stitching lines firmly, then trim. Then I pull the top threads only. I find it gives me less of a mess, and more control, to gather this way.


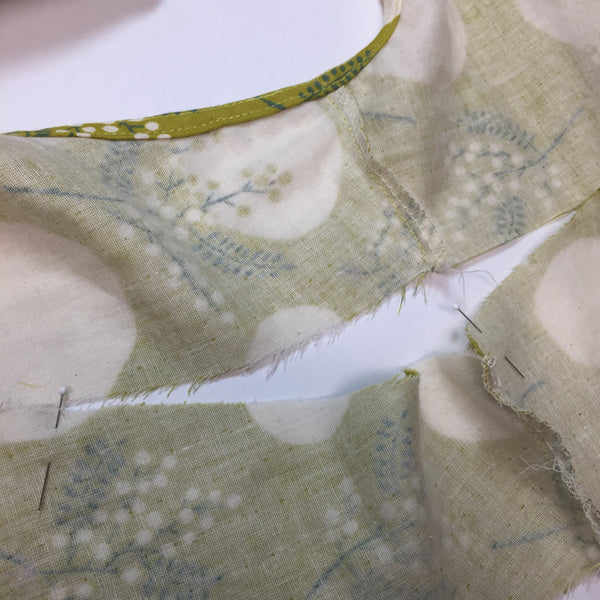
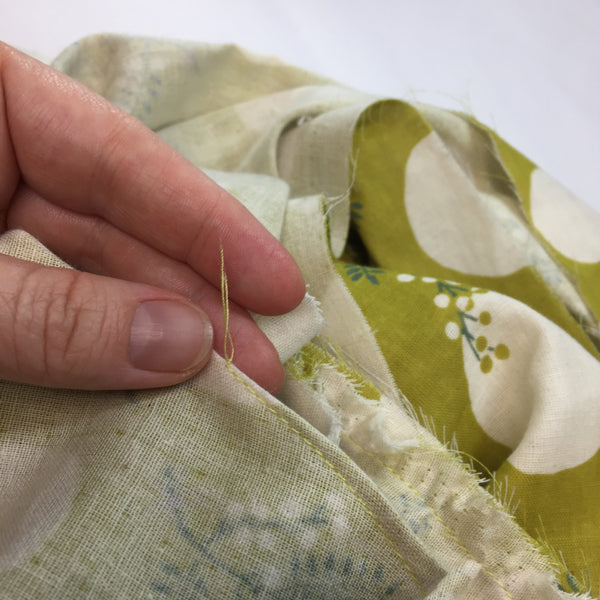
After you've gathered but before you pin, go ahead and locate your dart ends (remember, I thread-marked them after cutting).
Fold the darts, right-sides together, and pin the gathered section to the flat section, making a smooth fold from one dart end to the other. Be sure to line up the shoulder seams. Distribute the gathers somewhat evenly, although, it looks best to have them slightly more concentrated at the top or shoulder area and they will be a little more concentrated on the short back portion of the dart.

Even though we typically sew gathered sections with the folds or gathers against the machine bed, in this case I sewed with them up so I could really control how the gathers travelled into the stitching line.

Once you've pinned, stitch slowly and carefully. Leave long tails at the dart edges. Make sure you've caught all your gathers evenly.

Then knot off the dart ends and clip these threads (top of page 15).
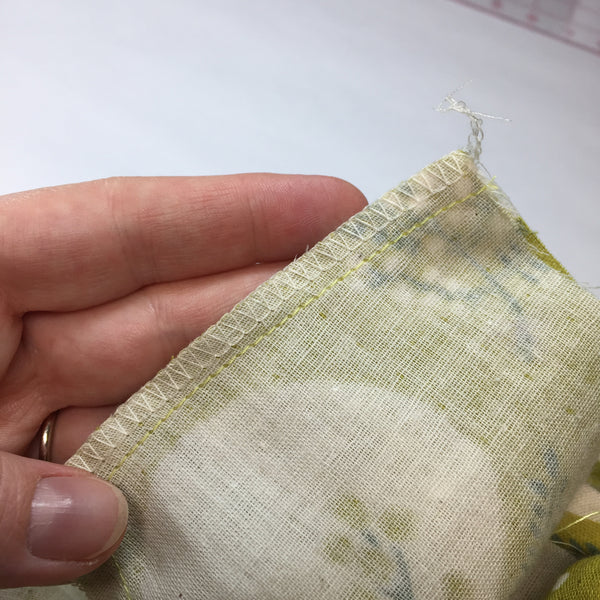
Finally, finish the dart (bottom of page 15). I chose to serge-finish, and pull my thread tails in the serging channel to hide them.


And now - it's pocket time! (Obviously, omit if you are making a dress without pockets!)
Fold the top pocket down 3/8" and press. Now fold the top down again another 1 1/4" and press.


Then, go ahead and stitch right next to that lower fold, to complete the upper pocket edge:


Finish the bottom edge of the pocket (step 5d at the top of page 16), then pin it upside down, right sides together, right at the notches on the side panel.

Stitch, and then turn up - wrong side of pocket against right side of side panel. Gently press.

Go ahead and baste the sides of the pockets to the panel (bottom of page 16), or if you're naughty like me, just put a couple pins in!
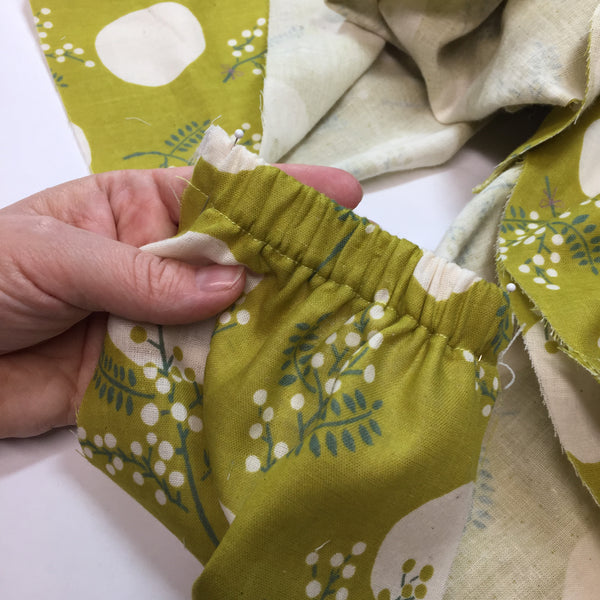
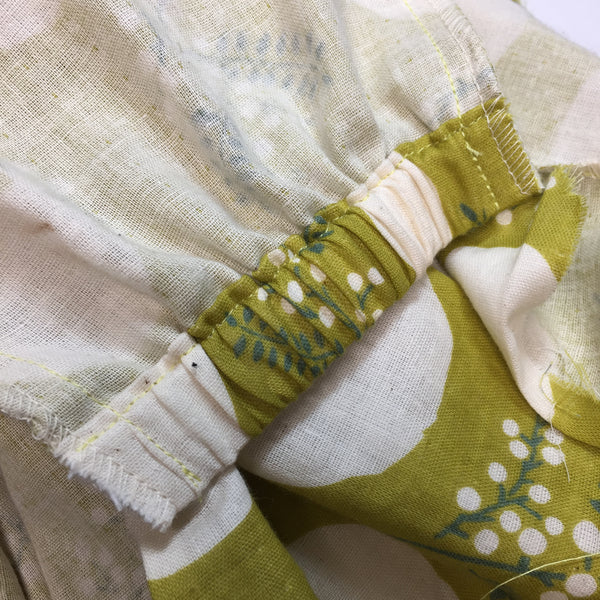
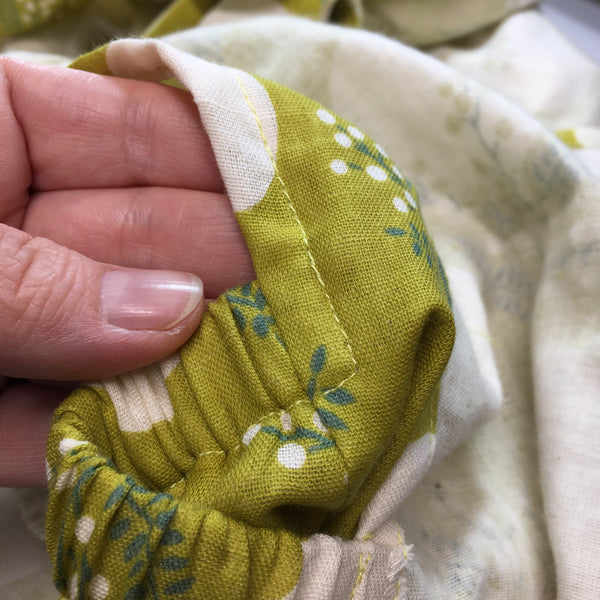
Now, we'll finish our elasticized side panel, at the underarm of the dress.
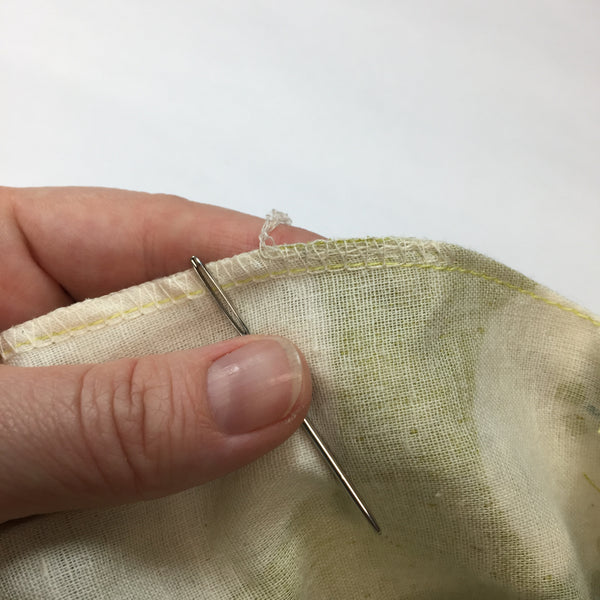
Similarly to how we double-folded the pocket piece, go ahead and press 1/4" to the wrong-side of the side panel top, then fold again at the marked notches and press again. You are creating a little casing for your elastic.


Stitch 1/8" from this lower fold, to complete the casing:
Now, thread the elastic (as per the table lengths at the bottom of page 17) through these casings. Since the elastic length is so short, it's easy not to get this bit twisted. Thank goodness for small mercies!

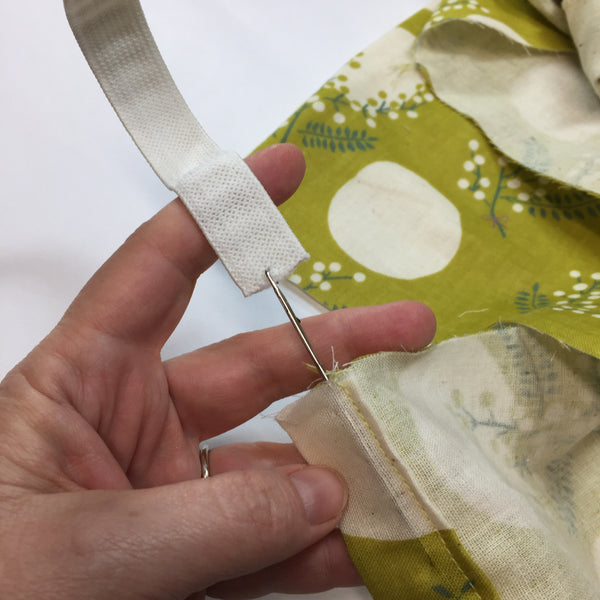
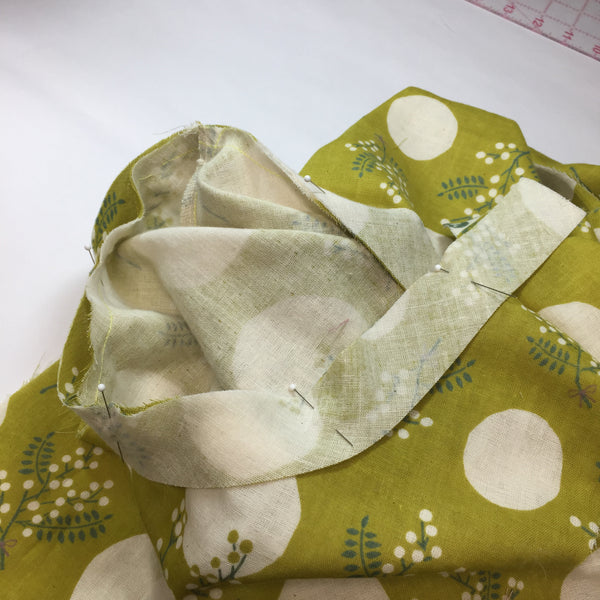
Pin both ends of the elastic to the side seam. You can tack at one end, planning to adjust your elastic later (as per instructions on page 18):
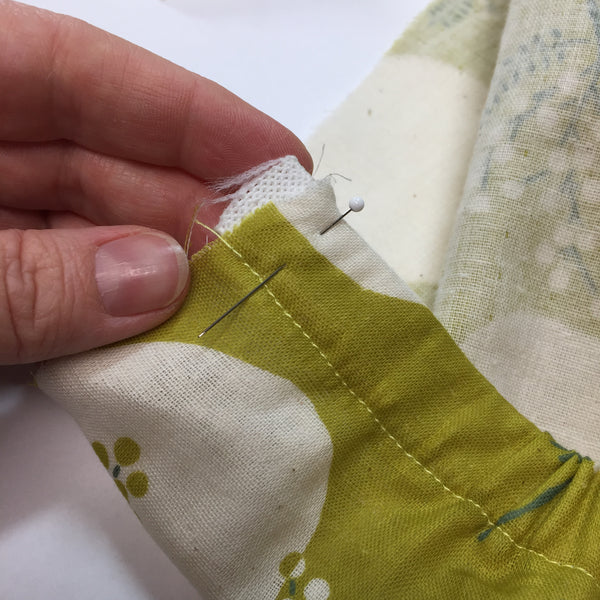
Abut this top edge of the elastic right to the thread-marked underarm dots, and pin securely (step 7a at the top of page 18). Then stitch (as per the right-hand seam at the bottom of page 18).


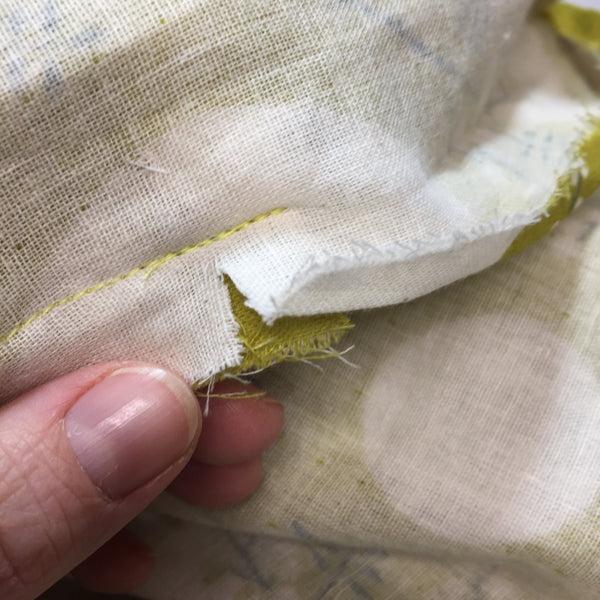
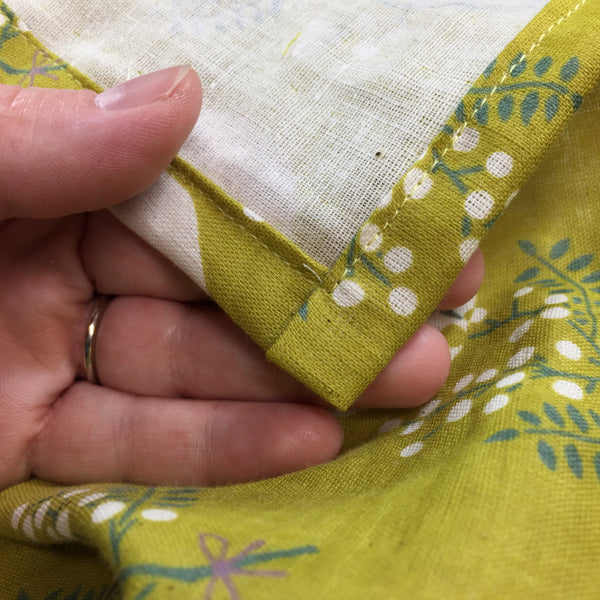
In order to most easily finish that little sleeve edge, I clip right to the stitch line 1/2" from where this last seam ended:
Then, I finish up the side seams (step 7c on page 18), in this case with a serge-finish:
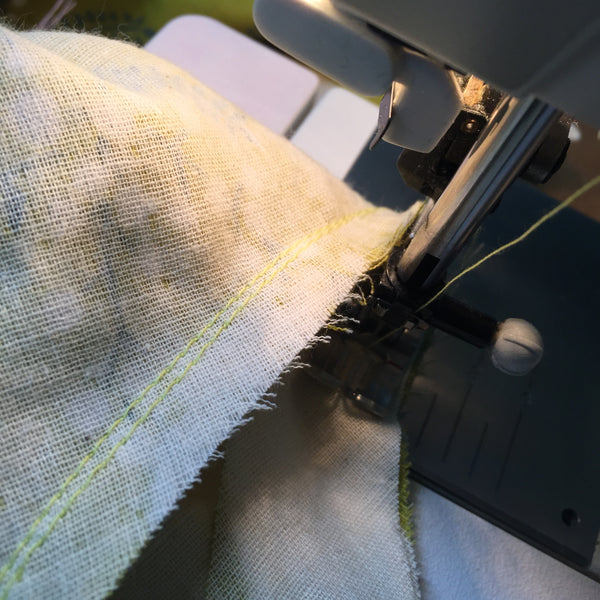
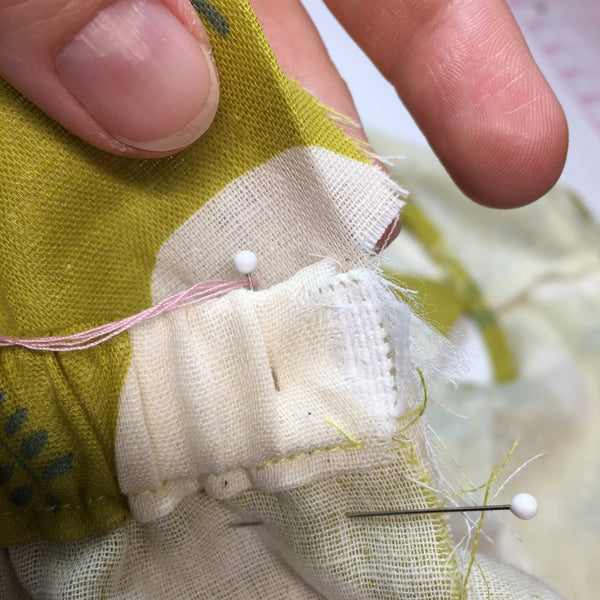
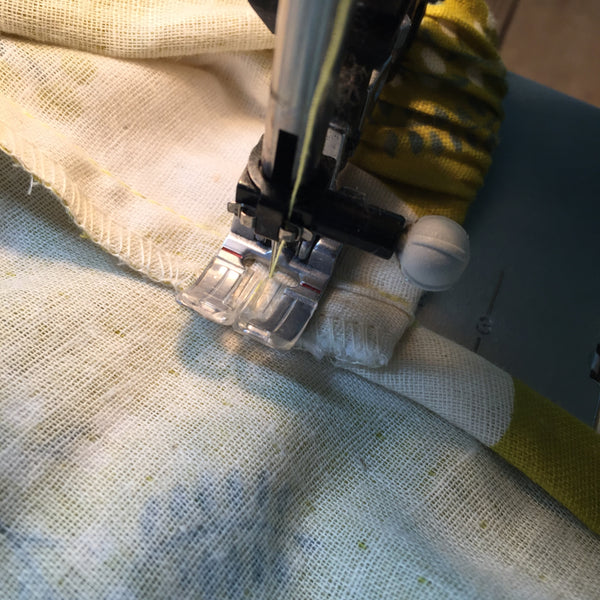
Now, I fold my sleeve hem and tuck it right under that finished seam! I will be stitching right on top of the casing fold's stitchline, and all the way around my finger-pressed sleeve hem!


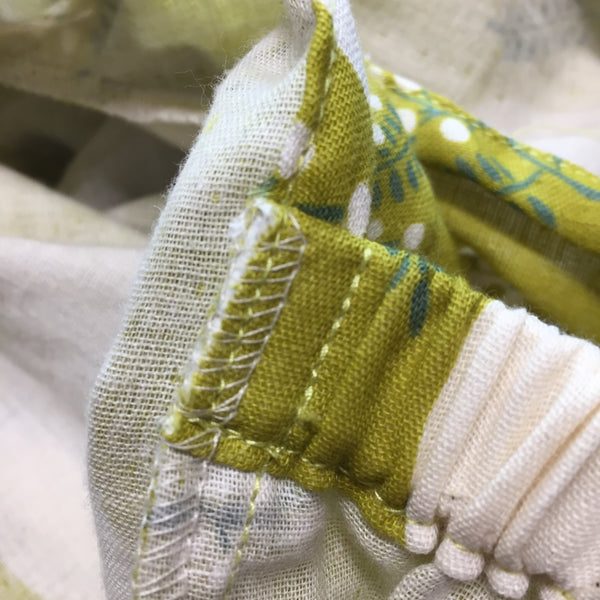
Here is a super-closeup of that finished sleeve hem/side panel intersection!

Now, it's time to press, press, press! We will be pressing the vent seams open and turning up our hem twice. Grab a cup of coffee, take a stretch, and then commit to some time on the ironing board. The more you press and pin carefully, the smoother it will feel in the machine and the better the hem and vent will flow.
I elected to do a simple hem, not a mitered one.


Now it's time for our belt (if we're making one)! Stitch our short edges together, and press them open:
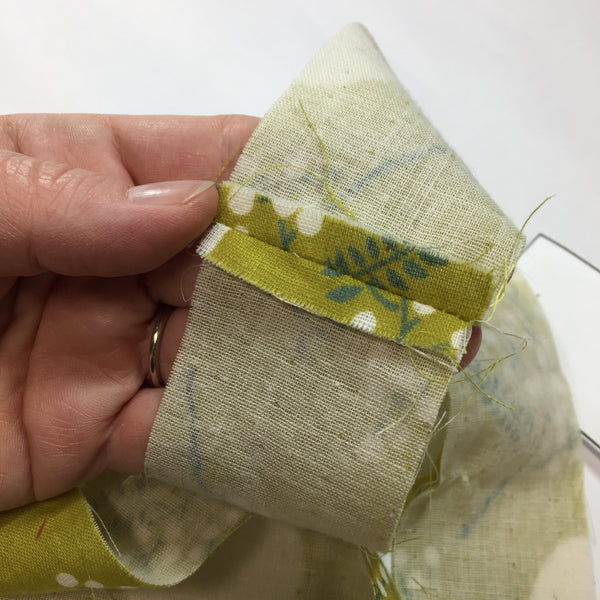

Now, stitch the long edges together. Before turning, press the seam allowances open. This will create a better-looking belt. Again: pressing, patience, and time on that ironing board. It's worth it!
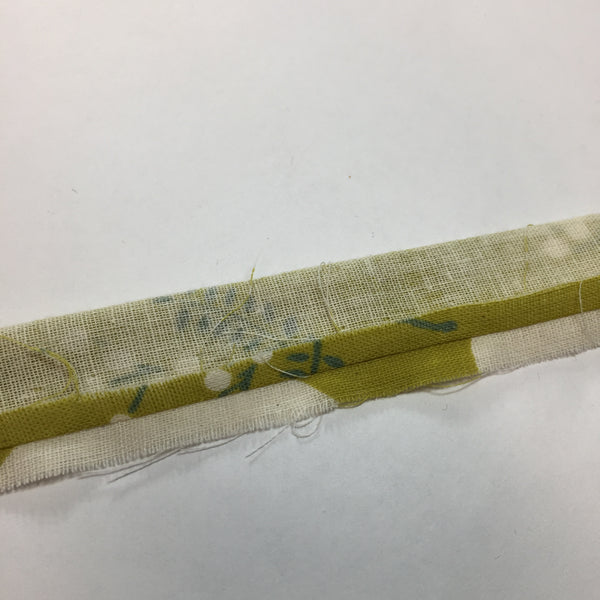


Incredibly, we are all done!
Throw on your new frock, and strut your stuff! You did beautifully.

***


About me: my name is Kelly Hogaboom and I am a clothier here in lovely Aberdeen, Washington. I sew as a business and for fun - you can't drag me out of my studio easily! You can find me on Facebook and Instagram - as well as my new Twitch stream!