The Free Range Slacks Tutorial for Sew My Style 2020

 
     I am so honored that my Free Range Slacks pattern has been chosen as June's Sew My Style 2020 pattern.  If you aren't familiar with Sew My Style, visit Petite Font's blog to read more about it. Sew My Style has a special place in my heart as it brought awareness to my brand when I was struggling along in the beginning years of my business.  The Toaster Sweater #2 was the first month and season's pattern of the very first Sew My Style and it was thrilling to see so many new sewists wearing Toaster Sweaters on Instagram. 
     This year is also special to me because I have I added extended sizes in some of the existing styles and in all styles going forward. The Free Range Slacks are one of those styles and are available in Standard sizes 00-20 as well as Curvy Fit sizes 18-34 and you get both size ranges with your purchase. 
     In the coming days of this post, I will be showing you how to sew the Free Range Slacks step by step. I had planned a video sewalong for the initial release of this pattern however, it was derailed when it was near completion. I really wanted to have a tutorial/sewalong finished for Sew My Style this year so I have quickly put this one together. I will be adding to it daily until it is finished sometime this week. 
     Update - Kelly Hogaboom of Bespoke Hogaboom has done a Vimeo video tutorial on the Free Range Slacks for her #gimmiesomeslack sewalong. You can check that out here for more details, tips and tricks. Kelly is an amazing tailor with so much experience and advice to supplement my instructions. 
FIT AND FABRICS:
     The Free Range Slacks offers two style options. Version #1 is a tapered leg that is intended to have the bottom hem rolled up a few times. Version #2 is a straight leg that looks semi-wide and is cropped. There is an optional back pocket and you can have one, two or no back pockets.
     I personally think of Version #1 as a casual pant and it looks great in both linen as well as cotton twill and light to mid weight bottom weight fabrics that aren't too stiff. A thick and stiff denim may add some puffiness to the elastic waist. I also think version #1 looks great with lots of topstiching that is included in the instructions. If you like your rolled hem to expose pretty insides, the instructions offer an option to do flat felled seams on the outer legs and a partial French seam on the lower inseam but these are optional and you can also just sew a standard seam as well. 
     Version #2 can be casual or dressy and I think it looks best in linen and other pant weight fabrics that are on the lighter side of mid-weight that have a little swoosh or drape to them. Linen, linen/rayon or linen/viscose, tencel, lyocell, wool gabardine all work nicely. They can easily pass for dressy or casual depending on how you style them and what fabric you choose to sew them in. Again, I think topstitching plays a part in that as well. If I want mine to look a bit dressier, I leave off the topstitching and the back pockets but I think they look great either way. It is not necessary to use flat felled or French seams here but if you are one who prefers neat insides, go for it. 
     The side panels are a feature on both versions #1 & #2. I originally designed them this way so that there would not be a seam directly over the widest part of the hip and so there would be a seam towards the back to break up that area so it wouldn't look like a large empty space on the rear. Having the seam there also makes it easier to line up the back pocket. It is also a great design feature for anyone wanting to make a striped pair and play with stripe direction or color blocking for some fancy slacks. 
CHOOSING YOUR SIZE:
    I would advise choosing your size according to your hip measurement unless your waist is larger than your hips. I always check the finished garment measurements chart to see how much ease there is and make my size choice from that rather than the size chart. Remember that if the size chart says that a size 20 hip measurement is 50" (for example), that doesn't necessarily mean that your 51" hips won't fit. It's all about how much ease you want to have so again, always check the finished measurement guide. 
     Again - if you aren't sure if you should use the Standard fit or Curvy fit, please check the Size Guide here. I will say that the biggest difference between the Standard and Curvy sizes 18 and 20 are that the Curvy fit has a little longer rise and wider waist yet the calves are a little slimmer. 
Version #1 in mid-weight linen in Standard size 18.
Version #2 in a cotton/linen blend pique in Standard size 4. 
FITTING ADJUSTMENTS:
     If you plan to make a muslin first, you might check out the fitting tips included with the pattern. Those tips address the most common pant fitting adjustments. Just remember that your pants will look a bit different in various fabrics so you may not care too much for them in the bland, stiff fabric you may have chosen for your muslin, but imagine how they may loosen up or relax in a more supple linen or other fabric with a bit of drape. Also drapey linens and especially rayons and viscose fabrics with lots of drape and not a lot of structure, may seem as though the pants are a half size larger than a rigid cotton pair. 
     If you prefer not to make a muslin but are cautious about the fit, I would advise sewing the side panels and inseam together with a long loose straight stitch (basting stitch) that is easy to take out if needed. You can assess the fit and then take in or let out seams accordingly before sewing and finishing the seams or going through the effort of making the flat felled seams. 
NOW LET'S GET STARTED SEWING!
1 a. First we are going to finish the outer, unnotched edge of the POCKET EDGE FACING (piece 7) and it's pair as well as the inner, unnotched edges of the FRONT POCKET (piece 6) and it's pair. Finish the edges with a zig-zag stitch or a serged edge. You can also use pinking shears but I prefer the first two methods.  Also - from here on out, when I say "finish the edges", I will always be referring to the zig-zag or serged finishes. 


Step 1 a. finishing the inner and bottom edges of the FRONT POCKET (6) shown above and finishing the outer, unnotched edge of the POCKET EDGE FACING (7) shown below.

1 b. Staystitch the diagonal edge of the pocket opening on the FRONT PANT (1 or 3). Set your machine stitch length around 1.5 and stitch 1/4”/6mm away from the edge. Repeat with the other FRONT PANT. Staystiching helps keep the diagonally cut edge from stretching out during handling and sewing. 
b. Staystitching on the diagonal pocket opening of the FRONT PANT shown below. I apologize that it is difficult to see - look very closely. 
1 c. With right sides together, pin the POCKET EDGE FACING (7) to the FRONT PANT (1 or 3) at the side pocket edge, aligning notches. Stitch the pieces together using a 3/8”/10mm seam allowance. Trim the seam allowance down to approximately 1/8"/ 3mm. 
1 d. Understitch the seam allowances down on the facing side. Repeat with the other set. Understitching keeps the seam flat and helps to avoid rolling of the facing once the seam is pressed toward the inside. 
1 d. Understitching the POCKET EDGE FACING. Stitch about 1/8"/3mm or closer to the seam and with the seam allowance underneath pressed in the direction of the facing so it is caught in the understitching. 
1 d. The understitched POCKET EDGE FACING from the right side shown below.
 
1 e. Now fold the POCKET EDGE FACING toward the inside and press.
1 e continued. And then topstitch 3/8”/ 10mm away from the edge. Repeat with second pocket opening.
1 e. The pocket opening of the FRONT PANT after topstitching the facing down shown below.

1 f. With right sides up, slide the FRONT POCKET (6) under the FRONT PANT (1 or 3), align notches and pin in place. Repeat with second FRONT POCKET and FRONT.
 1 f. The FRONT PANT and FRONT POCKET just before you put the together shown above.
1 f. The FRONT PANT positioned over the FRONT POCKET and pinned in place shown below.
 
1 g. To topstitch the FRONT POCKET in place, you may either first mark the stitch lines on the FRONT PANT with chalk or fabric pencil using the POCKET TEMPLATE (10) OR you can wing it by feeling the ridge of the pocket underneath the pant front and stitch as you go - it’s easier than you might think however, you may want to practice first. Stitch about 1/4”/ 6mm away from the pocket inner edge and pivot at the bottom. It is optional to use two rows of topstitching but I like two rows for extra secure pockets. 
1 g. Topstitching without a chalked guide. I am feeling the ridge of the pocket underneath and also using my pins to guide my pocket topstitching. You may also use the topstitch guide pattern piece to mark your stitch lines if you don't feel like winging it as shown above.
1 g. The finished pocket topstitching. It is difficult to see but notice that the top and side of the pocket is held in place with a basting stitch as shown below. 
1 h. Secure the top of the pocket opening through all the layers by stitching on the edge of the pocket opening from the top waist to the slight corner or bend. This keeps it laying flat so it doesn't gap open once the waistband facing is sewn down and the elastic is inserted. Repeat on second pocket.
OPTIONAL BACK POCKET
2 a. Turn the top of the optional BACK POCKET (9) down 1/4”/ 6mm toward the wrong side and press. Repeat with second BACK POCKET.
2 b. With right sides together, fold the top of the pocket back on itself at the notches.
2 a. The folded top pocket edge and 2 b. the turned back top pocket before it is stitched down shown above.
2 c.   Stitch the unnotched (top fold notch is not visible at this point) side down 3/8”/ 10mm away from the edge. Finish the unnotched, inner edge and bottom BACK POCKET with a zig-zag stitch, serged edge. Repeat with the second BACK POCKET.
 2 b. The stitched top corner of the Pocket edge and 2 c. the finished inner and bottom edges shown above.
Although the instructions state to clip the corner, I like to leave the corner unclipped and use it as support for a sturdy, crisp corner. I know the below images are a bit blurry but I hope that you can see that I am first folding the seam allowance inward...
Fold the seam alllowance in,
then turn it right side out....
Then using the point of my small scissors to turn out a sharp corner.
2 d. Turn the top of the pocket right side out. Press the top and continue pressing the finished sides in toward the wrong side 3/8”/ 10mm and press. Repeat with the second BACK POCKET.
2 e. Topstitch the top of the BACK POCKET down 1”/ 2.5cm away from the top edge as seen below. Repeat for the second BACK POCKET.
To mark the placement of your back pocket(s), you may use chalk or a fabric pencil or marker and do so while cutting out your pieces. I am not as neat and organized and often do the pin method. You just have to be careful not let your pins fall out. Here are photos of how I mark the pocket placement with pins. 
2 e. Place the BACK POCKET on the BACK PANT (2 or 4), aligning the side seam notches and placement marks (in this case, pins). Pin in place. Repeat with second BACK POCKET (optional).

2 g. Edgestitch/topstitch the BACK POCKET in place starting from the top side seam down, pivot at the bottom corners and up the inner side. It is optional to make another row of topstitching (double or single stitching is your choice). Repeat with second BACK POCKET (optional).


2 h. Reinforce the top inner side with a small and tight zig-zag stitch/bar tack back and forth a few times to secure the BACK POCKET. Repeat with second
BACK POCKET (optional). I opted instead to stitch a triangle in the pocket corner to give extra support but a bar tack is best if the pocket is going to get a lot of wear and tear. 

SIDE SEAMS (VERSIONS #1 & #2)

If you are making the tapered leg version #1 and plan to roll up the bottom hem, I will be showing you the option to flat-fell the side seams so that they look more polished when rolled up. You don't have to do a flat felled side seam, however, if you'd like to, just skip ahead a bit to that part.

First I am going to show you the basic side seam method because I am making version #2 and won't be rolling up the pant legs on this pair. 

This part isn't in the instructions however, I would mark the top of your SIDE PANT (5) because it is very easy to get this piece turned around. 

3 a. With right sides together, pin the SIDE PANT (5) to the BACK PANT (2 or 4) at the side seam, aligning notches.

3 a. Then stitch the pieces together with a 5/8”/ 16mm seam allowance.

3 b. Now attach the FRONT PANT (1 OR 3) to the other side seam of the SIDE PANT (5). 

 Then finish both of the seam edges and press each seam so it is facing toward the side panel. Repeat for the other set. 

Press on the wrong side as well as the right side to be sure the seams are well pressed. 

3 c. Press the seams toward the SIDE PANT. Edgestitch/topstitch along the side seams on the SIDE PANT. Press. Repeat for the other set.

I did not actually topstitch this pair so below is an illustration of the step.

4 a. With right sides together, fold the pant length wise and align the inseams together, matching notches. Pin in place and then stitch together with a 5/8”/16mm seam allowance. Finish the seam edges together and press toward the back. Repeat with the other set.


 OPTIONAL FLAT FELLED SEAMS FOR VERSION #1 

I apologize for the poor photos. I didn't actually make the complete pants for version #1, but rather, this is a mock up of how to do the flat felled seams and the lighting was poor when I took these photos. 

3 a. With wrong sides together, pin the SIDE PANT (5) to the BACK PANT (2) at the side seam, aligning notches and stitch together with a 5/8"/ 16mm seam allowance. 3 b. Do the same for the SIDE PANT (5) to the FRONT PANT (1). 

Repeat for the other set.


Remove the basting stitch that holds the front pocket down on the Front side seam otherwise it will show up on your finished side seam.

3 c. Finger press the seams open and then trim the inner seam allowance edge (the seam closer to the SIDE PANT) down to 1/4”/6mm.

The illustration below may be more clear as to which seams to trim.

 3 d. Now lay the BACK PANT to SIDE PANT seam together and fold the BACK PANT seam (the longer side seam) over the trimmed seam of the SIDE PANT so that the edge meets the stitch line. The angle in the photo below doesn't look like the edge of the seam is touching the stitching but it is. Press. Repeat with the FRONT PANT to SIDE PANT seam allowance and then with the other set. Be sure the seams are even in width because this is what will be showing on the outside of your garment.

3 e. Lay the pant right side up and press the folded seam allowances toward the SIDE PANT. Press and pin in place. Repeat with the FRONT PANT to SIDE PANT seam allowance and then with the other set.

3 f. Stitch the seams down through all thicknesses. Press. Repeat with second set.

This is what the inside of your finished, flat felled seam will look like when the hem is rolled up. 

OPTIONAL PARTIAL FRENCH SEAM FOR VERSION #1

Again - my photos aren't great and this is a mock up rather than real pants.

The reason for the partial French seam and not a complete French seam all the way through the inseam is that I thought it would create bulk as it would be difficult to stitch it down to keep but that is an option for those willing to try. 

4 a. Mark the front and back inseam 6”/15cm up from the bottom hem. Mark with a pin or tailor’s chalk.

4 b. With wrong sides together, and using a scant 1/4”/6mm seam allowance, start stitching the inseam together from the mark down to the hem. Trim any fraying threads and press the seam to one side. Repeat with second leg.

4 c. Now turn the pant leg inside out so the right sides are together. 

Clip just above the French seam so that the rest of the seam can lay flat.

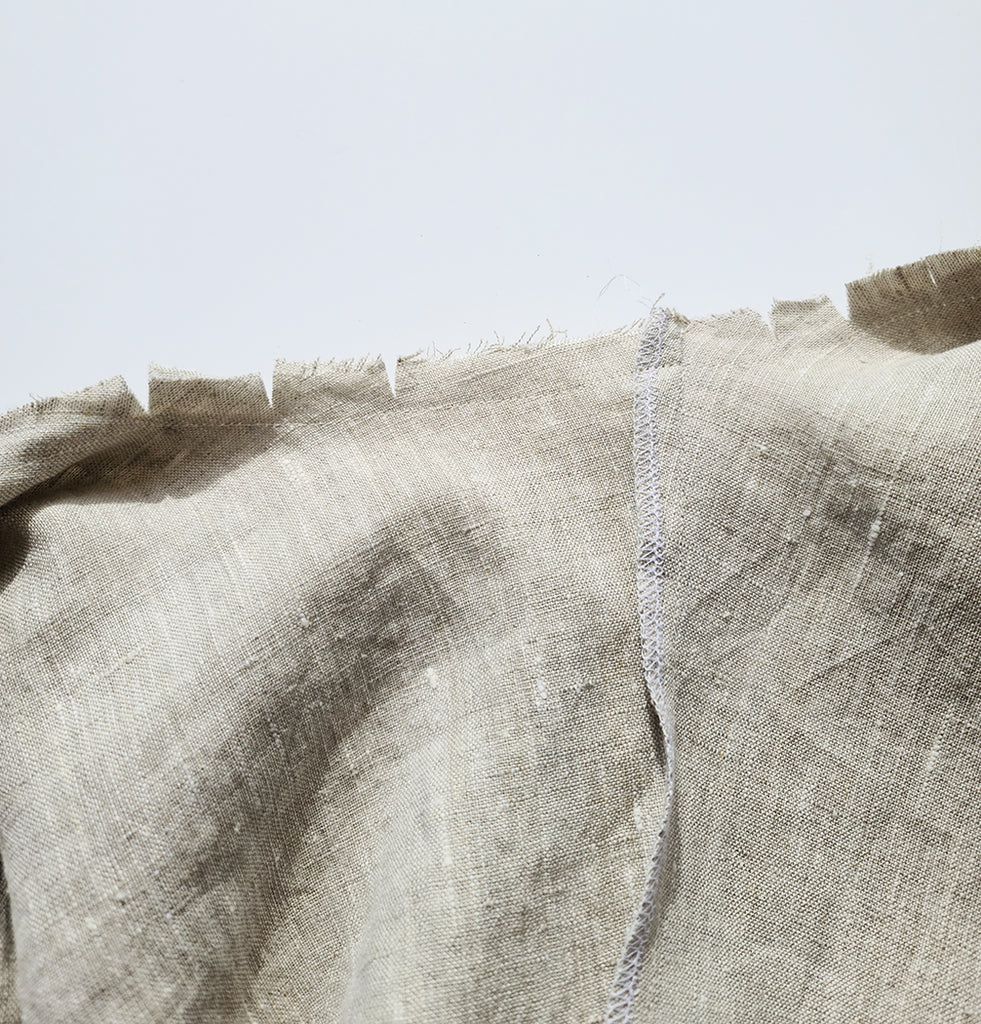
Using a 3/8”/10mm seam allowance, enclose the raw edges of the first seam by stitching from the hem up through the entire inseam. Only the 6”/15cm area will be French seamed while the upper section will have a raw edge.

Finish the rest of the seam edges together and press toward the back.Repeat with the second leg.

This is how the French seam will look when the finished pant hem is rolled up.


THE RISE

5 a. Now turn one pant set right side out and slip the leg down into the leg of the inside out pant half so that right sides are together. Align crotch seam of the rise and pin in place.


5 b. Stitch the front through the back rise with a 5/8”/16mm seam allowance. Stitch again over the first row of stitching to reinforce the seam.

Clip the curves without clipping at the bottom crotch. Finish the edges together.


5 c. Press the seams toward the wearer’s right side. Edgestitch/ topstitch on the the right side of the seam all along the rise seam. The topstitching is optional and I am omitting it on this pair of pants but below is an illustration of the step.


ATTACHING THE WAISTBAND FACING

Before I start sewing my WAISTBAND FACINGS, I like to mark the top backs of them so I know what end is what. You can see below that I have marked them with pins. 

6 a. With right sides together, sew the WAISTBAND FACINGS (8) together at the center front and center back short ends. Press the seams open. 

6 b. Then turn up the bottom, unnotched edge of the WAISTBAND FACING 3/8”/10mm toward the inside and press.

Going back a step to 6 a. -

If you've taken just slightly smaller or larger seam allowances in the pant side seams, that can cause the WAISTBAND FACING too large or small for the pant waist so I like to check before sewing one of the facing seams.  I actually prefer to just sew one seam (say the center back seam) of the WAISTBAND FACING and then hold up the facing to the pant waist to see how much of a seam allowance I should use for the Front WAISTBAND FACING seam. 


6 c. With right sides together, pin the WAISTBAND FACING to the top of the pants, aligning notches and center front and center back seams. 

Then stitch the facing to the pant waist with a 5/8”/16mm seam allowance.

Grade the seam allowance by trimming one layer of the seam allowance shorter than the other so there isn't such a thick, lumpy seam of fabric when the facing is turned right side out but rather, the thickness graduates. Press the seam toward the facing.

6 d. Understitch the WAISTBAND FACING by stitching close to the seam on the WAISTBAND FACING side and catching the seam allowance on the backside.

This is also a good time to stitch a label in the back of the WAISTBAND FACING.

Turn the WAISTBAND FACING toward the inside. Press and pin in place.

6 e. Starting near the center back, create the elastic tunnel by stitching the WAISTBAND FACING down 1 7/8”/4.75cm away from the folded edge. Stop stitching before you complete the tunnel - leaving an opening approximately 2”/ 5cm wide to insert the elastic.

6 f. Cut a piece of 1 1/2”/ 40 mm wide elastic so that the length fits perfectly around your waist without stretching plus an additional 1/2”/ 13mm.

6 g. Attach a sturdy safety pin to one end of the elastic and insert it through the waistband tunnel opening. Push the safety pin through the tunnel until the elastic is all the way through.

6 h. When the elastic is completely through the tunnel, make certain that it hasn’t twisted on its journey. Pin the elastic together and try the pants on to be sure the elastic length is comfortable and adjust if needed. 

Now overlap the elastic 1”/2.5cm and stitch back and forth across the overlapped area several times to ensure the elastic stays tacked together.

 I sometimes stitch the elastic together and then fold the seam to one side and reinforce it together as I have done here.

6 i. Complete the stitching to enclose the waistband elastic.

6 j. Distribute the waist gathers evenly. Now stitch over the top of the existing topstitching, if you did topstitch, or stitch in the ditch as I did here for the distance of the waistband height at the center front and center back seams to secure the elastic and keep it from rolling once it is on.

There stitching in the ditch is pretty much hidden but secure's the elastic. Repeat this in the center back. If you added a label, you can just stitch above and below the label. 

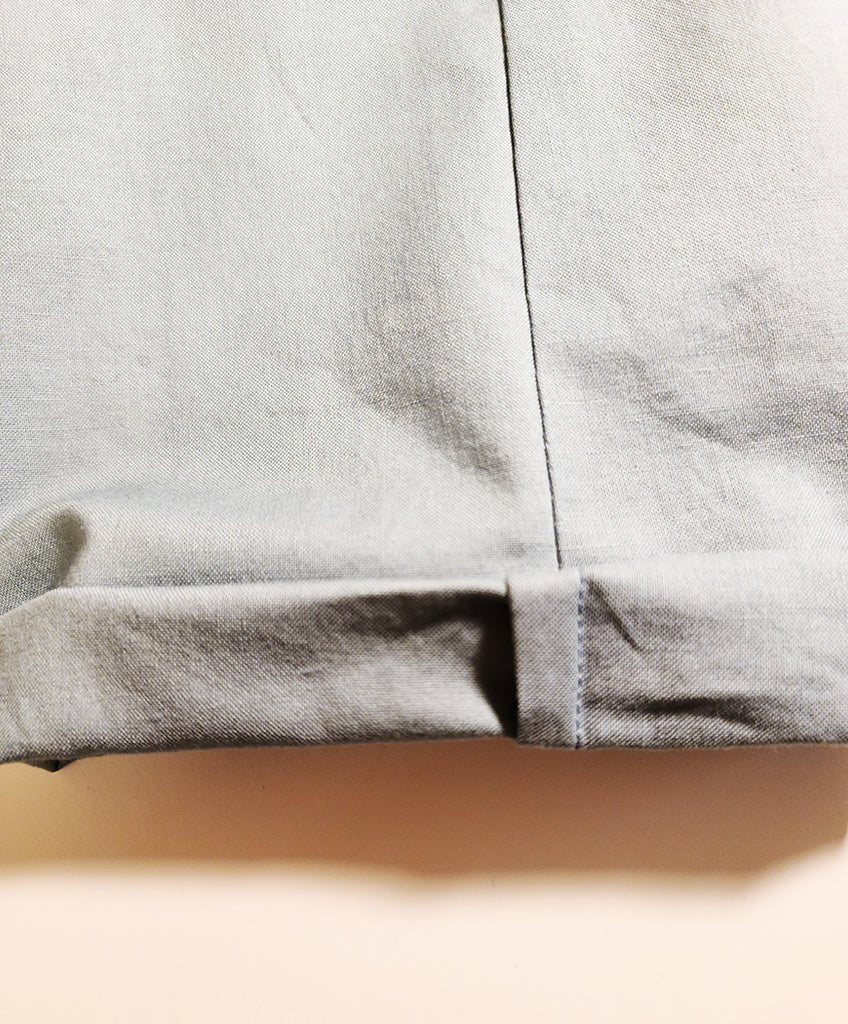
HEMMING THE PANTS (VERSION #2) 

7 a. Turn the bottom leg up 3/8”/10mm and press.

Then turn up the bottom another 1 1/8”/2.85cm for a deep hem and press and pin in place. Repeat with the second leg.


7 b. Stitch the hem in place 1”/2.5cm away from the bottom edge. Press. Repeat with the second leg.


HEMMING THE PANTS (VERSION #1) 

7 a. Turn the bottom leg up 3/8”/10mm and press. Then turn up the bottom another 1/2”/13mm and press. Repeat with the second leg.

7 b. Stitch the hem in place 3/8”/10mm away from the bottom edge. Press. Repeat with the second leg.

7 c. Roll the bottom hem of the legs up two or three times. 

YOU ARE FINISHED YAY!

Thank you for joining in! 

Peggy