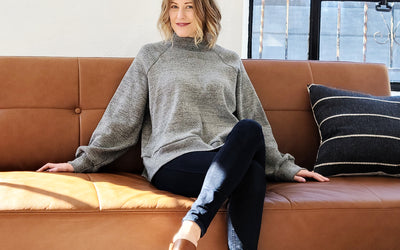
Welcome to the Sleeve Head Pouf sewing tutorial!
This is also the final portion of the Regalia Blouse sewing tutorial! That is if you'd like to add a little volume to your Regalia Blouse sleeves.
I'm a child of the 80s and I sewed A LOT back then. I sewed most of the prom dresses for my friends and most of them had BIG sleeves if they weren't strapless. Did you ever wonder how those big sleeves kept their volume and didn't deflate? Well... a tulle sleeve head was added to the sleeve seam at the shoulder. I recently released the Regalia Blouse pattern that has gathered, puffy sleeves. Now they aren't BIG sleeves like some of those from the 80's prom dresses I sewed, but I did notice that the longer sleeves tend to lose their ooomph as well ones sewn in rayon or drapier fabrics. So I decided to make a small, optional Sleeve Head Pouf that could be added to the Regalia Blouse if one chooses. You can use this technique for any blouse or dress that has a sleeve that is gathered at the shoulder.
Supplies: You will need a 1/4 yard piece of tulle. I like to use the finer tulle because it isn't as scratchy against the skin. If you want more volume or sturdiness to your Sleeve Head Pouf, you can double or triple the layers of tulle. If you are making a BIG puffy sleeve, you can enlarge this pattern and use the larger mesh tulle for a stiffer, sturdier pouf.

Fold the Sleeve Head Pouf in half so that the curved edges with the notches meet. Press and pin in place.

Set your machine stitch length to the longest option (baste stitch) and stitch 3/8”/10 mm away from the raw edges of the curved, notched edge of the Sleeve Head Pouf. Leave the thread tails long and do not backstitch.


Gently pull the bobbin thread tails to form gathers.

Gather the Sleeve Head Pouf until it is approximately 5” inches/13 cm long and the gathers are fairly even (tapering off at the sides). I believe that I said 6" long in the video tutorial but either length is fine really - somewhere between 5 & 6 inches. Secure the length and gathers by stitching on top of the basting stitch and back tacking at the start and finish of the stitch.

You can finish the edge with a serger or zig-zag stitch. I prefer to keep the edges serged rather than using a binding as it is less bulky for this lightweight, casual blouse.

Attach the Sleeve Head Pouf at the shoulder of the armhole seam. Start with the garment inside out and flip the armhole seam back towards the neck.
Now pin the gathered raw edge of the Sleeve Head Pouf to the seam so that the folded edge of the pouf is centered over the shoulder seam. Secure it in place within the seam allowance so that once the garment is right side out and the armhole seam is facing the sleeve again, the Pouf seam is sandwiched between the armhole seam and the Sleeve.


Ta Da! You've got volume! Well... at least a little bit. If you need big volume for a bigger sleeve, you might want to use the heavier tulle, and scale up the Sleeve Head Pouf pattern a bit. You can also bind the edge of the Pouf instead of serging or zig-zagging it and hand stitch it into your garment for a more professional look.

Thanks for joining us!
XOXO,
Peggy


