


Welcome to the Cosmos Sweatshirt sew-along for Version #2, Sleeve B. Before you start, just know that while a serger is great for knits, it is not required. Just be sure to use a ballpoint sewing machine needle and please review the section on page 2 "Sewing With Knits - 3" of your instructions to help determine what stitches to use on your standard sewing machine.
Attention - If you are sewing Version #2 but with Sleeve A, just skip the cuff assembly and attachment portion of this tutorial and go to the Version #1, Sleeve A tutorial for the Sleeve hemming instructions.
Anyhow, the image below is of me in my organic cotton French terry sweatshirt that has been cropped/shortened 1". I also reduced the bottom band width by 1" on each side (4" total) because the bottom was "winging out" due to the stiffer nature of this fabric. The "winging out" was exaggerated by the cropped length. In these instructions I talk about basting the neckband and bottom band on to see if the bottom width looks good and the neckband tightness is right before securing them.
If you'd like to see how to shorten or lengthen the pattern, see the version #1 tutorial here.

And now on with the sewing.
With right sides together, attach the Front to the Sleeve aligning notches. Repeat with the second Sleeve.

Press the seams towards the sleeve.

With right sides together, attach the Back to the Sleeve. Press the seam toward the Sleeve and repeat with the second Sleeve.


With right sides together, join the short ends of the Neckband in the round. Use a straight stitch and stitch over the seam twice for security.

Press the seam open.

With wrong sides together, fold the Neckband in half lengthwise so that the raw edges meet and press.
Find the quadrants of the Neckband by laying it flat with the seam at one end. Insert a pin at the seam and another pin at the opposite folded end.
Now arrange the Neckband so that it is flat with the pins and seam in the center. Insert another two pins - one at each folded end.
Also find the quadrants of the sweatshirt neck opening by inserting pins at the center front and center back notches. Then lay the neckline so that the pins are lined up. Then insert two pins - one at each sleeve neck at the fold.

With right sides together, pin the Neckband to the neckline of the sweatshirt. Align the back seam of the Neckband to the center back notch/pin of the sweatshirt neckline. Continue to match up the pins with each quadrant pin.


Using your standard sewing machine, baste the Neckband in place using a long straight stitch. Stretch the Neckband to fit the neck opening of the sweatshirt. I always baste knit neckbands on before securing them with a serger or zig-zag stitch because knit fabrics vary in amounts of stretch and each fabric will produce a different amount of tension. You may need to unpick the Neckband and take out length or cut a new longer Neckband for more width.

Now try on the garment and decide if the Neckband looks too tight, too loose or just right. Unpick the basting stitches and adjust the length of the Neckband if needed.

If the Neckband looks right, go ahead and secure it with a serger or zig-zag stitch.

Press the seam toward the body. It's optional if you'd like to topstitch the seam allowance down just under the seam on the outer side. This helps keep the Neckband laying flat. I will be 2-needle topstitching the Neckband further down in this tutorial. Again - this is optional.

If making Sleeve A, visit the tutorial for version #1, Sleeve A here and turn up the sleeve hems and press. Unfold the prepressed hems before sewing up the side seams.
With right sides together, attach the Front to the Back at the side seams. Start at the bottom opening and stitch up through the underarm and pivot down the sleeve to the sleeve opening. You can do it in the reverse direction but I like this direction because it makes it easier to keep the sleeve seams pressed towards the sleeve.

Press the seams flat before pressing them towards the back in order to help shrink up and rippling or stretching out that may have occurred.

Press the seams towards the back.

If making Sleeve A, you can visit version #1, Sleeve A here and press and hem the sleeve opening.
With right sides together, fold the cuff lengthwise and stitch up the side. If using a serger, press the seam to one side. If using a standard sewing machine, use a straight stitch and make two passes for security. Repeat with the second Cuff.

If using a straight stitch, press the seam open (the less bulky method). If using a serger, press the seam to one side (a little bulkier).
Now fold the Cuff in half so that wrong sides are together and the raw edges and notches meet. Press.

With right sides together, pin the Cuff to the bottom Sleeve opening matching notches and underarm seams.

You only need to insert two pins - one at the seam and one at the notch. The Sleeve opening will be much larger than the cuff.

Attach the Cuff to the Sleeve, stretching the Cuff to fit the Sleeve between the pins.

Press the seam towards the Sleeve as best you can.

With right sides together, attach the Front Bottom Band to the Back Bottom Band at the side seams. If using a standard machine, use a straight stitch and make two passes for security.

If using a standard machine, press the seams open (less bulky). If using a serger, press the seams towards the back (bulkier).

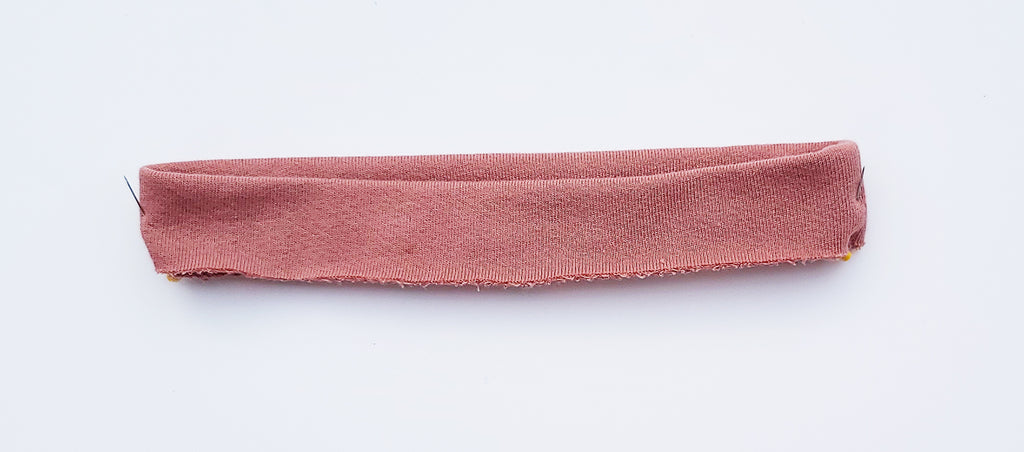
With wrong sides together, fold the Bottom Band in half so that the raw edges are together and notches aligned. Pin together at the center front and center back notches as well as the side seams.

Here I go again with the basting but just look at what CAN happen with the one-to-one ratio Bottom Band. The copper sweatshirt below is winging out at the front and back. This is in part due to the fabric and also more noticeable when the sweatshirt is cropped and around the high hip instead of the widest part of the hip. I like a one-to-one ratio with drapier fabrics or fabrics with elastane and lycra content so the Bottom Band doesn't pucker however, not all fabrics behave the same so baste and then decide if you'd like to reduce the Bottom Band width.
Copper sweatshirt cropped 1" and with Bottom Band unaltered.


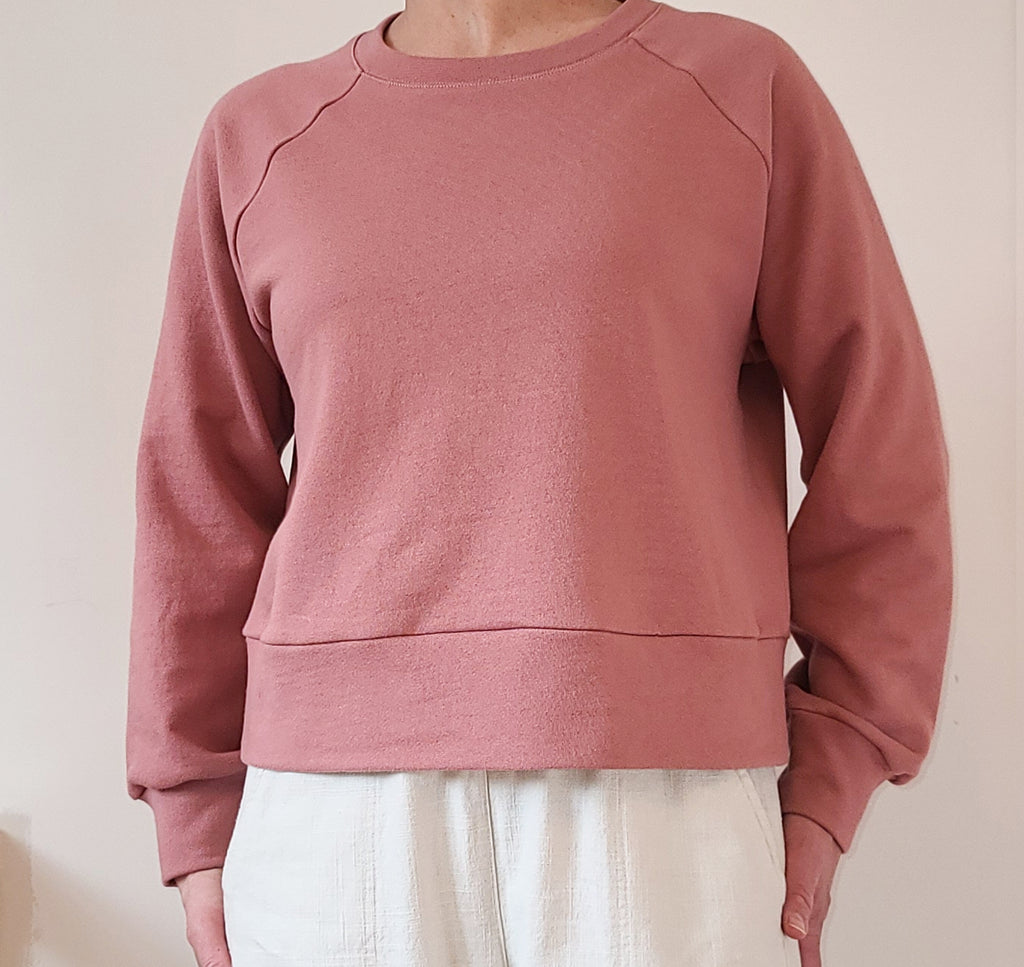
Rose colored sweatshirt, cropped 1" but with 1" width taken off each Bottom Band side (total of 4" narrower). The bottom band was then stretched to fit the opening. The copper and rose colored fabrics are the same organic cotton French terry fabric - different colors obviously.

Before you go trimming the Bottom Band, baste it on as is and try it on.
With right sides together, pin the Bottom Band to the bottom opening of the sweatshirt aligning the pins and side seams.

Using a basting stitch, attach the Bottom Band to the sweatshirt. If you have altered the Bottom Band width, you will need to stretch the Bottom Band to fit the opening between the pins.


Try on the sweatshirt and decide if you need to unpick the basting stitches and reduce the Bottom Band width.
To reduce the width, I trimmed 1"/2.5cm off each side of each Bottom Band piece (4"/10cm total). You can play around with what you think is the best amount but this worked well in this fabric for a size 4.

Attach the Bottom Band again if necessary.

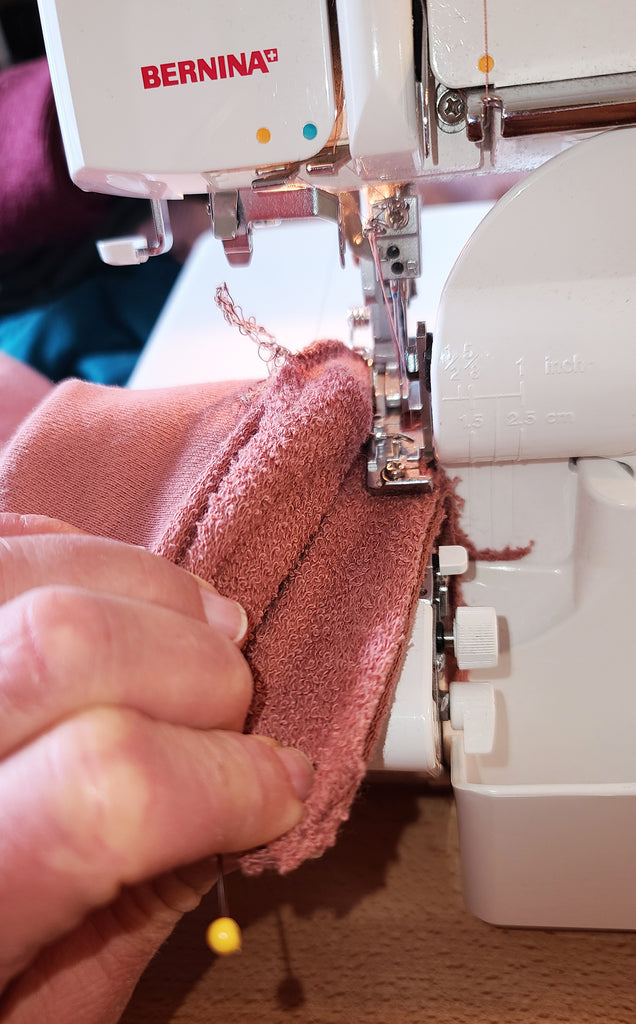
Once you've determined that the Bottom Band looks good, secure it with a serger or zig-zag stitch.

Press the seam towards the body.

Optional - if you choose to topstitch the neckline down or add decorative topstitching to the raglan seams or bottom band seam, I recommend using a twin aka double needle. I'm not positive that the one shown below is for knits but this is what one looks like. I went with the .3mm width between the needles to make it easier to keep the stitching straight and straddled over the seam.

When using a twin needle, you thread two spools of thread through together just as you would one spool until you get to the needles. Then one thread goes through one needle and the other through the other. You still use one bobbin in the typical manner. The bobbin thread zig-zags between the two stitches creating a stretch stitch and a professional look.


I straddled the needles over the Neckband seam. It is much easier with a wider width between the needles. Caution - this was more difficult for me than usual. My eyesight has gotten bad enough that I had to use magnifying glasses to be sure I wasn't sewing over the seam.

I also added a label. Not required but it adds a nice finishing touch and helps note the back of the garment. Also, if you donate clothes to resale shops, they usually only take clothing with labels in them. Good Will will often throw away clothes without labels.

Give your garment a good steaming and your finished!

You did it! Your Cosmos Sweatshirt is complete!
We would love to see your sweatshirt on social media if you choose to share. #cosmossweatshirt
Thank you and happy sewing!
Peggy