Hello everyone!
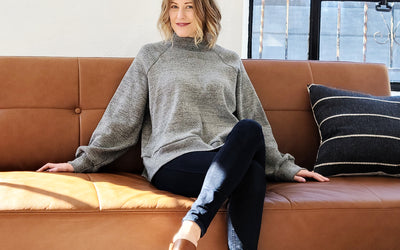
I am so happy to introduce you to Jane - our first employee at Sew House Seven. Jane is the new Design and Social Media Assistant here and you will be seeing lots of hacks, tips and ideas from Jane here on the blog and Instagram. She also made these amazingly cool patchwork Burnside Bibs and shares the pattern hack below so you can make your own pair of scrap busting bibs. Welcome Jane!
Peggy
Hello stitchers,
Have you noticed a new (old) trend lately?
Patchwork is back, and I am *here* for it. It’s a great way to get creative, use up scraps and spice up your favorite basic patterns! Today we are going to add some patchwork flair to the Burnside Bibs.
I am going to focus on the hack itself and not the full pattern- if you have never sewn this pattern before you can check out the full tutorial here!
Before you get started, wash and iron your fabric. Select one color for your main body and whatever smaller pieces you like for the patchwork bib. I also chose an accent color for my front pockets, but you can do whatever you like. (Accent straps, anyone?)
In addition to the sewing implements the pattern calls for, you will need:
- Tracing paper
- 2 different colors of pencil or marker
- Ruler (clear quilting grid ruler is ideal)
First you will need to locate the Bib & Facing pattern piece for the version you have chosen. Cut 1 from your tracing paper.

Now it’s time to design your patchwork bib! You can get as wild as you like, but keep in mind that curves require a more advanced level of finesse. Take a look at quilting books and blogs for inspiration, or start from scratch. I decided on a symmetrical pattern made from strips, so I first identified the center of the pattern piece with red pencil. I highly recommend using one color to map out center, grain lines and one line 2 5/8” from the bottom which is where the top of the waistband will sit- everything below this line will be covered. (I didn’t do this and consequently lost the green portion of my bib!)

Once you have this groundwork, take your second color and draw out your design. Mine was very geometric so I used my center line and a clear quilting ruler to make sure my other lines were truly parallel or perpendicular. Remember to transfer the original pattern notches. Here’s what it looked like:

Next, label all of your pieces in a way that will make sense when it’s time to put them back together. If your pattern is symmetrical, you don’t need to cut out all of your pieces- just mark them with “Cut 2” and remember to cut them on folded fabric or flip the pattern piece for the second one. Cut them apart.

Now for the tricky part. As you cut these out from your fabric, you will need to add a seam allowance to every side that is NOT original to the pattern piece. I marked out my seam allowance in chalk before cutting. I decided on 1/2” but anything over 1/4” is appropriate. Just be consistent!

I chose to finish all of my edges with a serger, this step isn’t completely necessary but smaller pieces are more vulnerable to wear and tear over time.

Sew all of these pieces together using your chosen seam allowance. Press seams open. I sewed mine together in sections based on seam direction:


This will now be your bib front! Cut a second bib for your facing and you’re ready to move forward with the standard instructions.
Happy stitching- don’t forget to tag us on Instagram, we would love to see what you do with this tutorial!

#burnsidebibs


