It is time for the long-awaited Tea House Top & Dress sew-along!
First, a little bit about me: my name is Kelly Hogaboom and I've been sewing about thirty-two years! I had the honor of hosting the Toaster sew-along a couple months ago, where I got to meet a few of you. So naturally I was excited to make up a couple of the Tea House Top & Dress patterns, as I really love Peggy's work.
There is so much to love about the Tea House, but I'll try to keep it brief as chances are if you're here you're already committed to making it.
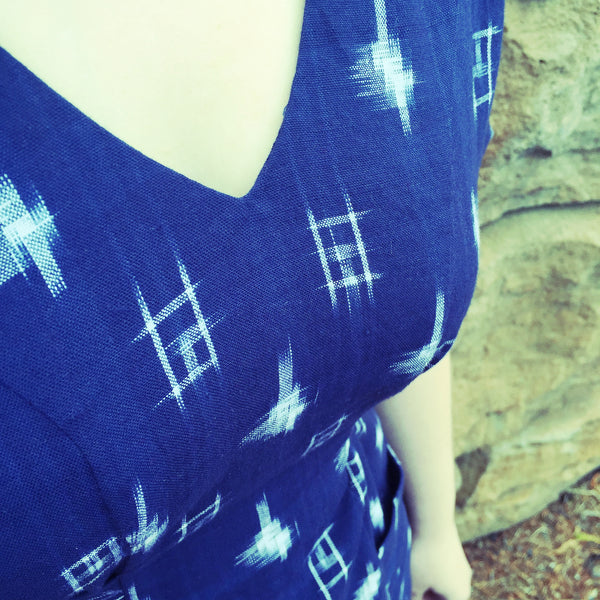
The Tea House is an a-line dress meant for light- to medium-weight fabrics with drape. A fabric without drape is fine; you just don't want something with too much body or stiffness. It features a v-neckline, front and back curved yokes, seam-inserted patch pockets, and cut-in sleeves with cuff. The Tea House comes in six views that include three lengths (hip-, above-the-knee, and tea-length) and two different tie options (I will be demonstrating or discussing all views).
The instructions are fabulous because several parts of the directions are like a mini-tailoring workshop. To wit: the wonderful deep-v neckline, with meticulous methodology to achieve a smooth effect:
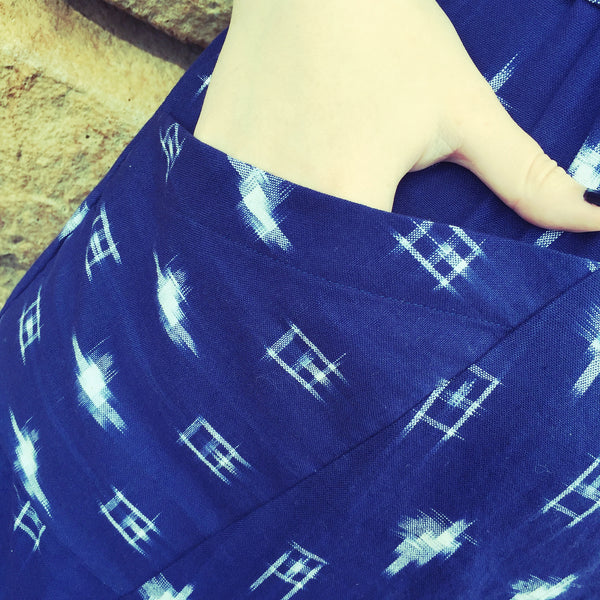
The patch pockets are large and comfortable, and you can use them to showcase color blocking, to blend into the dress, or - as I did with my medium-sized motif - to provide a subtle bit of interest by cutting on the crossgrain:
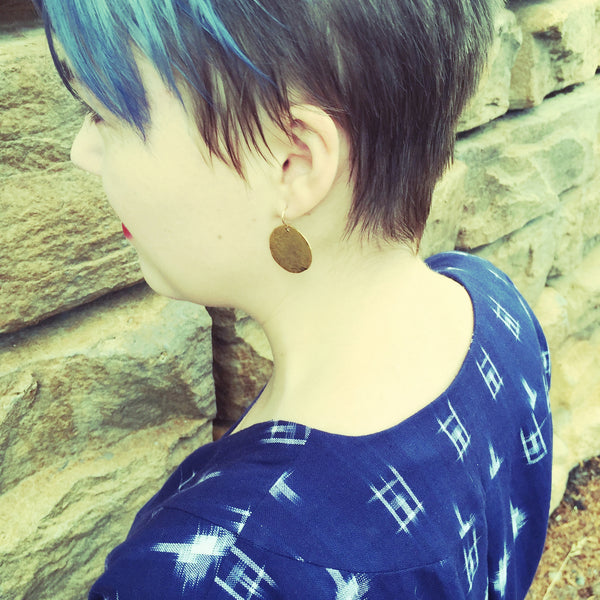
Finally: the front and back yoke and yoke facings are both graceful, and provide a dress interior that is as pretty as the exterior!
Supplies
This dress is very simple, using only a little bit of interfacing, and no closures!
I have two types of interfacing here; but as you can see from the pattern you only need a half yard as we are interfacing the top 1 1/8" of the yoke pieces and facings, and the pocket facings.
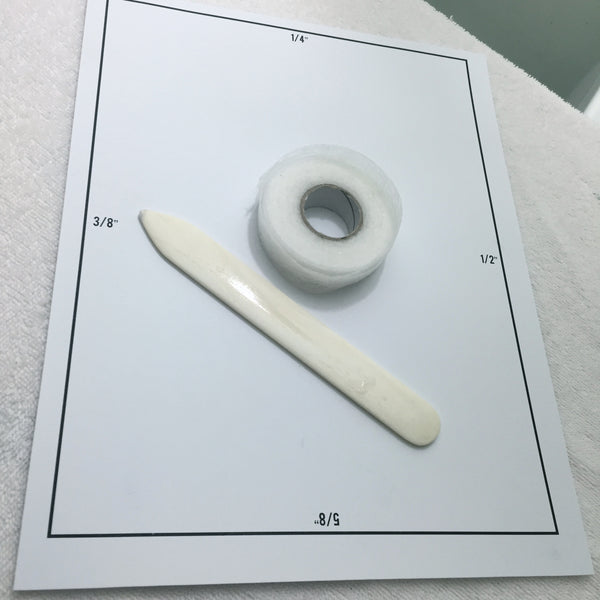
Besides your chalk, sewing machine, needle and thread (appropriatefor your fabric - I use a sharp for most woven projects), steam iron, ironing board, and press cloth, you may also benefit from a few extras:
A pressing template - a simple device to help get exact folds (you can download my version here) Double-sided fusible tape (often called by the brandname of "Stitch Witchery") A bone folder - perfect for turning out curves and points
I used a 100% cotton for the dress I'm demonstrating, which meant the fabric was very easy to handle. If you plan on using a fabric that has a shifting grain, has mechanical stretch, or is semi-sheer, I can help you through that. I wrote a bit about some of these tricky fabrics last year (before I stopped using silk); but you can also comment here and I'm happy to assist!
Pretreating Fabric
Next entry on the 12th, we'll be preparing our fabric and pattern, and cutting our dress pieces! So in the meantime, pretreat your fabric.
The general rule is, treat your fabric the way you'll treat the garment. I wash most of my garments on gentle cycle, and then air-dry.
But because we have a busy household, I assume at some point my garments might get machine-dried! So I generally machine-wash and -dry my fabrics (two or three times, if I'm using linen). Instead of pressing the fabric, I catch it in the dryer before the time cycle ends, then fold it along the lengthwise grain on my large cutting table (accordion-pleating the length in soft folds, so all the fabric is supported), and let it rest. This generally eliminates the need to press the fabric before cutting.
Questions? Fire away! We'll see you on November 9th for our next installment.